之前做的Java项目都是接手自别人,自己没有独立开发过。这几天抽空研究了一下Spring Boot做web开发,本文用作记录和参考使用。
准备工作
- 安装InteliJ IDEA;InteliJ IDEA基本上是Java和安卓开发必备工具,社区版可免费使用;
- 安装Mysql或Mariadb数据库。
使用Spring Boot + MyBatis + FreeMarker进行web开发
创建Spring Boot项目
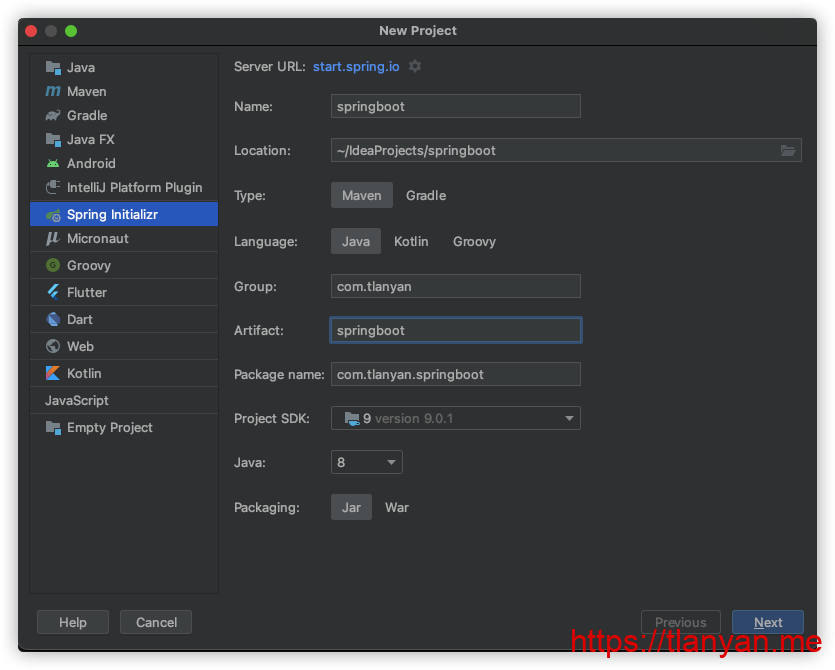
1. 打开IDEA,创建新项目,在引导对话框中选“Spring Initializr”,并自定义项目名称、包名,选择Java SDK和版本等:
2. 选择Spring Boot DevTools、Lombok、Spring Web、Freemarker、MyBatis和MySQL这几个包:

生成的pom.xml内容如下:
<?xml version="1.0" encoding="UTF-8"?>
<project xmlns="http://maven.apache.org/POM/4.0.0" xmlns:xsi="http://www.w3.org/2001/XMLSchema-instance"
         xsi:schemaLocation="http://maven.apache.org/POM/4.0.0 https://maven.apache.org/xsd/maven-4.0.0.xsd">
    <modelVersion>4.0.0</modelVersion>
    <parent>
        <groupId>org.springframework.boot</groupId>
        <artifactId>spring-boot-starter-parent</artifactId>
        <version>2.4.5</version>
        <relativePath/> <!-- lookup parent from repository -->
    </parent>
    <groupId>com.tlanyan</groupId>
    <artifactId>springboot</artifactId>
    <version>0.0.1-SNAPSHOT</version>
    <name>springboot</name>
    <description>Demo project for Spring Boot</description>
    <properties>
        <java.version>1.8</java.version>
    </properties>
    <dependencies>
        <dependency>
            <groupId>org.springframework.boot</groupId>
            <artifactId>spring-boot-starter-freemarker</artifactId>
        </dependency>
        <dependency>
            <groupId>org.springframework.boot</groupId>
            <artifactId>spring-boot-starter-web</artifactId>
        </dependency>
        <dependency>
            <groupId>org.mybatis.spring.boot</groupId>
            <artifactId>mybatis-spring-boot-starter</artifactId>
            <version>2.1.4</version>
        </dependency>

        <dependency>
            <groupId>org.springframework.boot</groupId>
            <artifactId>spring-boot-devtools</artifactId>
            <scope>runtime</scope>
            <optional>true</optional>
        </dependency>
        <dependency>
            <groupId>mysql</groupId>
            <artifactId>mysql-connector-java</artifactId>
            <scope>runtime</scope>
        </dependency>
        <dependency>
            <groupId>org.projectlombok</groupId>
            <artifactId>lombok</artifactId>
            <optional>true</optional>
        </dependency>
        <dependency>
            <groupId>org.springframework.boot</groupId>
            <artifactId>spring-boot-starter-test</artifactId>
            <scope>test</scope>
        </dependency>
    </dependencies>

    <build>
        <plugins>
            <plugin>
                <groupId>org.springframework.boot</groupId>
                <artifactId>spring-boot-maven-plugin</artifactId>
                <configuration>
                    <excludes>
                        <exclude>
                            <groupId>org.projectlombok</groupId>
                            <artifactId>lombok</artifactId>
                        </exclude>
                    </excludes>
                </configuration>
            </plugin>
        </plugins>
    </build>

</project>
3. 因为没有配置数据库等,项目此时还无法启动。在根目录下创建 application.yml 文件,输入如下内容:
server:
  port: 9000

spring:
  freemarker:
    template-loader-path: classpath:/templates
    cache: true
    suffix: .ftl
  datasource:
    url: jdbc:mysql://127.0.0.1:3306/demo?characterEncoding=utf-8&useSSL=false&useUnicode=true
    username: root
    password: password
    driver-class-name: com.mysql.cj.jdbc.Driver
mybatis:
  mapper-locations: classpath:/templates/mapper/*Mapper.xml  # mapper文件位置
  type-aliases-package: com.tlanyan.springboot.entity
如果熟悉properties文件的写法,可以直接编辑 src/resources文件夹下的application.properties文件
此时项目可以正常运行(Run -> Run “SpringbootApplication”)。
Spring Boot托管静态文件
静态资源放到 src/resources/static 目录下即可被访问到(添加新文件后需重新运行程序):
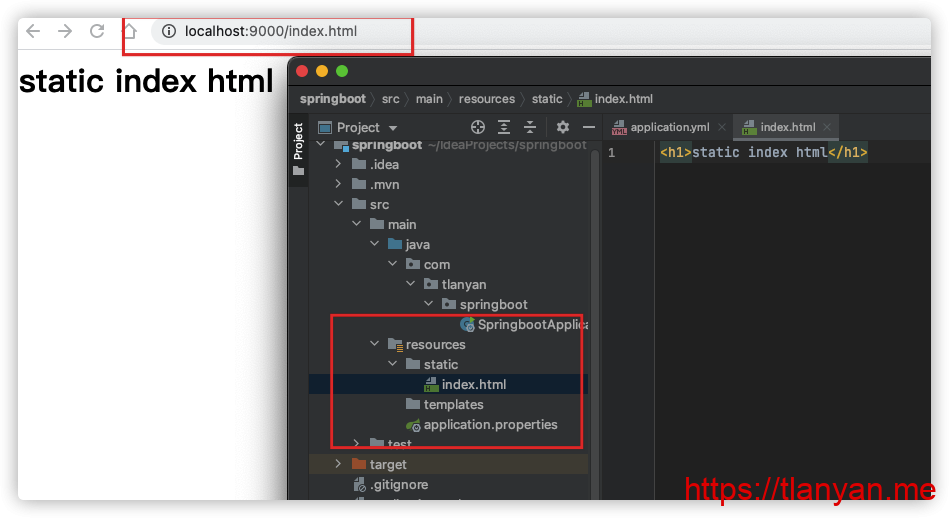
除了默认创建的static目录,静态资源文件还可以存放到public、resources和META-INF/resouces目录下。
Spring Boot + MyBatis + Spring MVC + FreeMarker
MyBatis 是一款优秀的持久层框架,它支持自定义 SQL、存储过程以及高级映射。MyBatis 免除了几乎所有的 JDBC 代码以及设置参数和获取结果集的工作。MyBatis 可以通过简单的 XML 或注解来配置和映射原始类型、接口和 Java POJO(Plain Old Java Objects,普通老式 Java 对象)为数据库中的记录。
首先创建数据库表对应的实体类:
package com.tlanyan.springboot.entity;

import lombok.Data;

import java.io.Serializable;

@Data
public class User implements Serializable {
    private Integer id;
    private String name;
}
然后创建Mapper接口:
package com.tlanyan.springboot.mapper;

import com.tlanyan.springboot.entity.User;
import org.apache.ibatis.annotations.Mapper;

import java.util.List;

@Mapper
public interface UserMapper {
    public User findById(Integer id);

    public List getAll();
}
以及在templates/mapper目录下创建UserMapper.xml文件(mapper文件需放到配置文件中的指定目录下,templates中的文件会被自动打包,因此我们选择这个位置):
<?xml version="1.0" encoding="UTF-8"?>
<!DOCTYPE mapper PUBLIC "-//mybatis.org//DTD Mapper 3.0//EN" "http://mybatis.org/dtd/mybatis-3-mapper.dtd">
<mapper namespace="com.tlanyan.springboot.mapper.UserMapper">
    <select id="findById" resultType="com.tlanyan.springboot.entity.User">
        SELECT * from user WHERE id = #{id}
    </select>
    <select id="getAll" resultType="com.tlanyan.springboot.entity.User">
        select * from user
    </select>
</mapper>
接下来编写service层:
package com.tlanyan.springboot.service;

import com.tlanyan.springboot.entity.User;

import java.util.List;

public interface UserService {
    public User findById(Integer id);

    public List<User> getAll();
}
以及其实现:
package com.tlanyan.springboot.service.impl;

import com.tlanyan.springboot.entity.User;
import com.tlanyan.springboot.mapper.UserMapper;
import com.tlanyan.springboot.service.UserService;
import org.springframework.beans.factory.annotation.Autowired;
import org.springframework.stereotype.Service;

import java.util.List;

@Service
public class UserServiceImpl implements UserService {
    @Autowired
    private UserMapper userMapper;

    @Override
    public User findById(Integer id) {
        return userMapper.findById(id);
    }

    @Override
    public List<User> getAll() {
        return userMapper.getAll();
    }
}
然后controller层:
package com.tlanyan.springboot.controller;

import com.tlanyan.springboot.entity.User;
import com.tlanyan.springboot.service.UserService;
import org.springframework.beans.factory.annotation.Autowired;
import org.springframework.stereotype.Controller;
import org.springframework.ui.Model;
import org.springframework.web.bind.annotation.PathVariable;
import org.springframework.web.bind.annotation.RequestMapping;

import java.util.List;

@Controller
public class UserController {
    @Autowired
    private UserService userService;

    @RequestMapping("/user/list")
    public String List(Model model) {
        List<User> users = userService.getAll();
        model.addAttribute("users", users);

        return "user/index";
    }

    @RequestMapping("/user/{id}")
    public String view(@PathVariable("id") Integer id, Model model) {
        User user = userService.findById(id);
        model.addAttribute("user", user);

        return "user/view";
    }
}
最后编写Freemarker模板。在 resources/templates 文件夹下创建user文件夹,新建index.ftl输入下列内容:
<h1>User List</h1>
<ul>
<#list users as user>
<li>ID: ${user.id}, name: ${user.name}</li>
</#list>
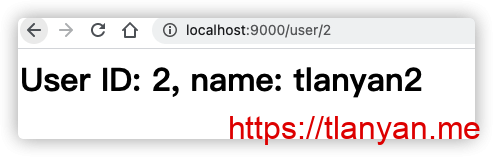
</ul>以及 view.ftl:
<h1>User ID: ${user.id}, name: ${user.name}</h1>数据库创建user表,并灌入数据,运行程序,程序输出结果如下:
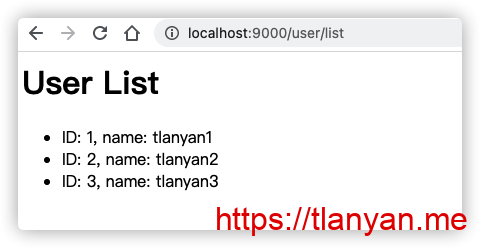
至此,Spring Boot + MyBatis + Spring MVC + Freemarker已经完全能正常工作。
Spring Boot使用Ehcache缓存
最后介绍使用Ehcache缓存增强程序性能。
首先引入Ehcache依赖。在pom.xml中引入ehcache:
    ...
    <dependency>
        <groupId>net.sf.ehcache</groupId>
        <artifactId>ehcache</artifactId>
    </dependency>
</dependencies>然后在resouces目录下创建ehcache.xml配置文件(Spring Boot会扫描这个路径,因此请保证文件名正确),并输入以下内容:
<ehcache>
    <diskStore path="java.io.tmpdir"/>
    <defaultCache
            maxElementsInMemory="10000"
            eternal="false"
            timeToIdleSeconds="120"
            timeToLiveSeconds="120"
            overflowToDisk="false"
            diskPersistent="false"
            diskExpiryThreadIntervalSeconds="120"
    />
    <cache name="user"
           maxElementsInMemory="10000"
           eternal="true"
           overflowToDisk="true"
           diskPersistent="true"
           diskExpiryThreadIntervalSeconds="600"/>
</ehcache>- name:缓存名称。
- maxElementsInMemory:缓存最大个数。
- eternal:对象是否永久有效,一但设置了,timeout将不起作用。
- timeToIdleSeconds:设置对象在失效前的允许闲置时间(单位:秒)。仅当eternal=false对象不是永久有效时使用,可选属性,默认值是0,也就是可闲置时间无穷大。
- timeToLiveSeconds:设置对象在失效前允许存活时间(单位:秒)。最大时间介于创建时间和失效时间之间。仅当eternal=false对象不是永久有效时使用,默认是0.,也就是对象存活时间无穷大。
- overflowToDisk:当内存中对象数量达到maxElementsInMemory时,Ehcache将会对象写到磁盘中。
- diskSpoolBufferSizeMB:这个参数设置DiskStore(磁盘缓存)的缓存区大小。默认是30MB。每个Cache都应该有自己的一个缓冲区。
- maxElementsOnDisk:硬盘最大缓存个数。
- diskPersistent:是否缓存虚拟机重启期数据。
- diskExpiryThreadIntervalSeconds:磁盘失效线程运行时间间隔,默认是120秒。
- memoryStoreEvictionPolicy:当达到maxElementsInMemory限制时,Ehcache将会根据指定的策略去清理内存。默认策略是LRU(最近最少使用)。你可以设置为FIFO(先进先出)或是LFU(较少使用)。
- clearOnFlush:内存数量最大时是否清除。
- diskStore 则表示临时缓存的硬盘目录。
package com.tlanyan.springboot;

import org.springframework.boot.SpringApplication;
import org.springframework.boot.autoconfigure.SpringBootApplication;
import org.springframework.cache.annotation.EnableCaching;

@SpringBootApplication
@EnableCaching
public class SpringbootApplication {

    public static void main(String[] args) {
        SpringApplication.run(SpringbootApplication.class, args);
    }

}
以及在service层开启缓存:
package com.tlanyan.springboot.service.impl;

import com.tlanyan.springboot.entity.User;
import com.tlanyan.springboot.mapper.UserMapper;
import com.tlanyan.springboot.service.UserService;
import org.springframework.beans.factory.annotation.Autowired;
import org.springframework.cache.annotation.CacheConfig;
import org.springframework.cache.annotation.Cacheable;
import org.springframework.stereotype.Service;

import java.util.List;

@Service
@CacheConfig(cacheNames = "user")
public class UserServiceImpl implements UserService {
    @Autowired
    private UserMapper userMapper;

    @Override
    @Cacheable
    public User findById(Integer id) {
        return userMapper.findById(id);
    }

    @Override
    @Cacheable
    public List<User> getAll() {
        return userMapper.getAll();
    }
}注意,cacheNames的值需要在ehcache.xml中存在。


发表回复